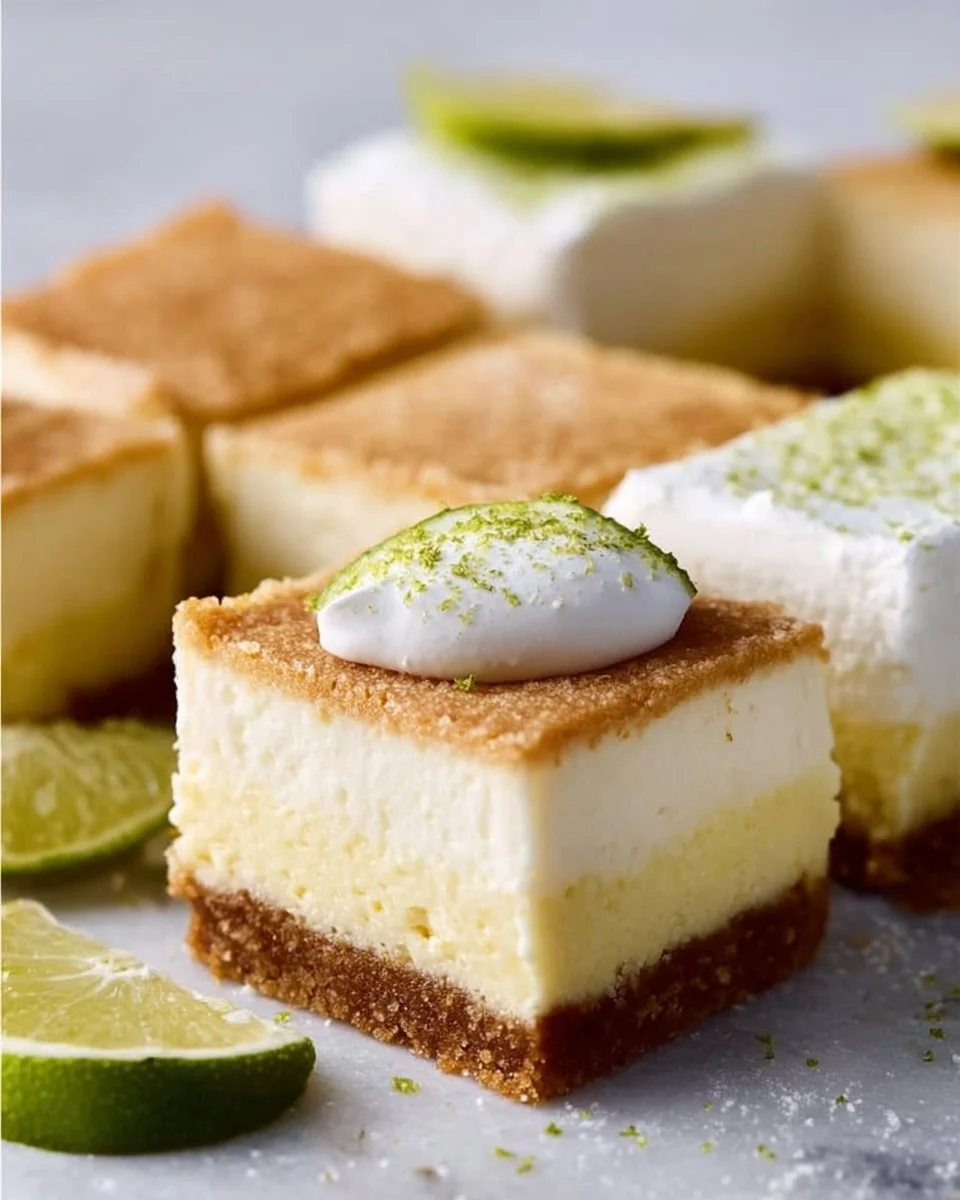
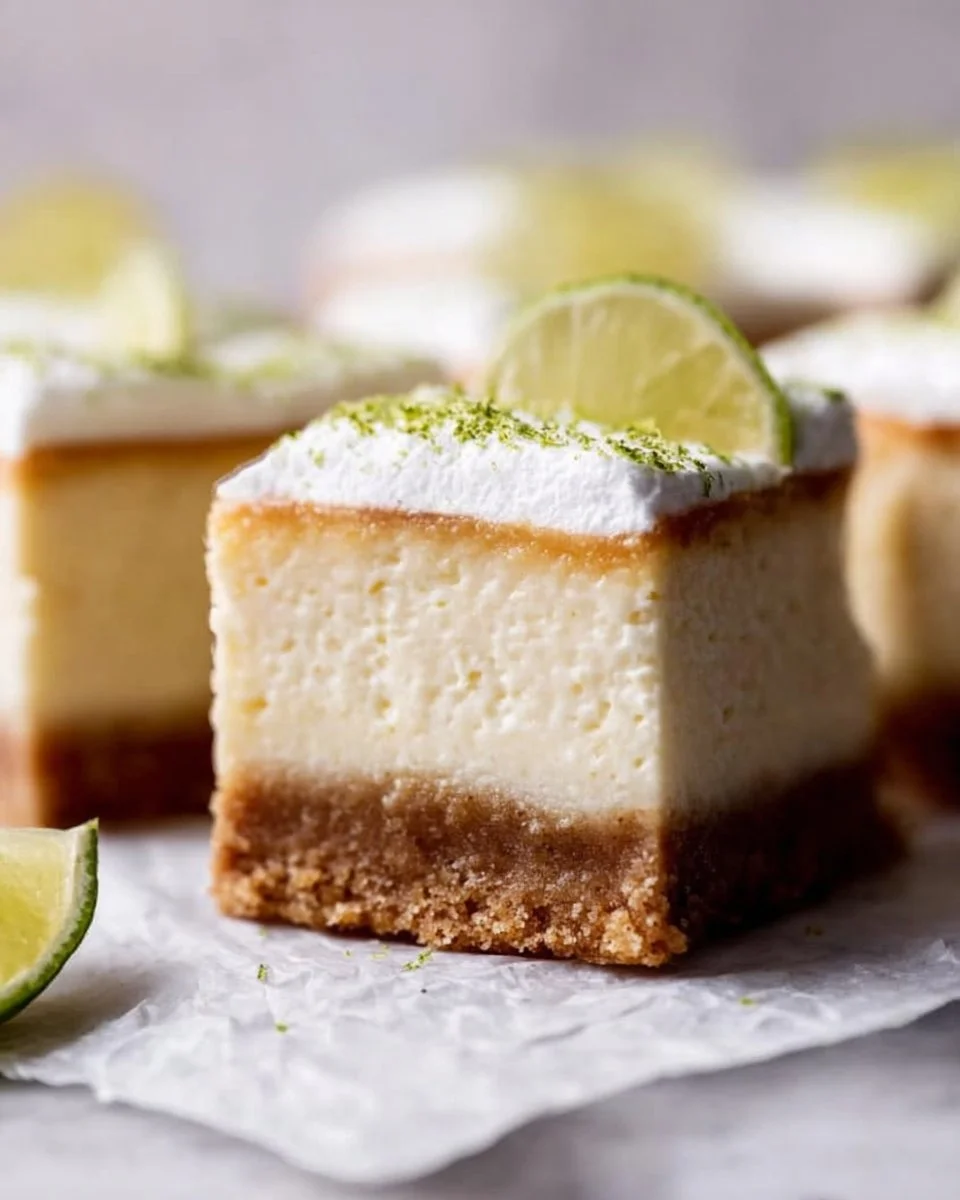
There’s something truly special about biting into a Key Lime Pie Bar—the perfect balance of tartness and sweetness that dances on your palate. These bars, with their creamy filling and crumbly crust, offer that delightful zing we all crave, especially when the sun is shining. I often whip these up for sunny picnics or cozy gatherings with friends, because let’s be honest, who can resist that luscious, vibrant green filling?
These delicious bars come together surprisingly fast—trust me, even busy weeknights can accommodate this treat! They’re incredibly versatile too; perfect as a refreshing dessert for summer barbecues or simply enjoyed as a sweet pick-me-up after a long day. And if you happen to have any leftovers (which is rare, but it happens!), they hold up beautifully in the fridge for a quick snack!
Why I Love Key Lime Pie Bars
Key Lime Pie Bars are one of my all-time favorites. They hit that sweet spot between creamy and tart, making every bite feel like a beach vacation! They’re incredibly easy and undeniably delicious—perfect for both beginners and seasoned bakers. Plus, they look beautiful, making them an elegant addition to any dessert table. A true winner at my table!
Key Lime Pie Bars Ingredients
The magic of these Key Lime Pie Bars truly lies in the harmony of flavors and textures. Each ingredient plays a crucial role in bringing this treat to life. Don’t worry about exact measurements just yet; those are all in the recipe card for you!
Essential Components
- 1 cup GRAHAM CRACKER CRUMBS: These little gems pack a mighty punch, providing a buttery, crunchy base that complements the luscious filling.
- 1/4 cup SUGAR: A touch of sweetness is essential to balance the tart flavors of the pie.
- 1/2 cup UNSALTED BUTTER, melted: This adds richness and binds the crust together perfectly—who doesn’t love a buttery crust?
- 2 large EGGS: They help set the filling, creating a smooth and creamy texture.
- 1 can (14 oz) SWEETENED CONDENSED MILK: This ingredient provides a luscious sweetness that’s simply divine.
- 1/2 cup KEY LIME JUICE: The star of the show! Freshly squeezed is best for that vibrant tartness.
- Zest of 2 KEY LIMES: For an extra punch of flavor, this brightens the filling.
- Powdered sugar (for dusting, optional): A light sprinkle on top adds a finishing touch.
Substitutions and Tips
Need a swap? If you can’t find key limes, regular limes work just fine. You might notice a slightly different flavor, but it’ll still be tasty! If you want to lighten things up a bit, you can use a bit of Greek yogurt to replace some of the sweetened condensed milk (though it won’t be quite as rich).
Here’s a practical tip: make sure your crust is pressed firmly into the pan for optimal texture. One more thing—don’t skip the chilling step! It’s crucial for the bars to set properly.
Kitchen Tools You’ll Need
- 8×8 inch baking pan (or a similar size)
- Mixing bowls (1 large, 1 medium)
- Whisk (or a fork works too)
- Rubber spatula
- Measuring cups and spoons
- Zester (for the key lime zest)
How to Make Key Lime Pie Bars
Let’s dive into creating this refreshingly tart Key Lime Pie Bar. I’ve broken down the process into simple steps so you can follow along, and you’ll have a delicious treat in no time. We’re aiming for creamy, perfectly set squares with a delightful crunch from the crust.
Preheat and Prepare
First, preheat your oven to 350°F (175°C). While it warms up, grease your baking pan with a little cooking spray or butter to ensure the bars come out easily after baking.
Mix the Crust
Next, in a medium bowl, mix the graham cracker crumbs, sugar, and melted butter until fully combined. You want it to resemble wet sand; this is key for a cohesive crust. Press the mixture firmly into the bottom of your greased pan to create a sturdy base for your bars.
Whisk Together the Filling
Now, in a large bowl, whisk together the eggs, sweetened condensed milk, key lime juice, and lime zest until the mixture is thoroughly smooth. This is where the magic happens—make sure there are no lumps and every ingredient is mixed well.
Pour Over the Crust
Once your filling is ready, pour it evenly over the crust in the baking pan. The contrast of the creamy lime filling against the crunchy base is simply irresistible!
Bake Until Set
Bake for 20-25 minutes or until the filling is just set. You want to see a slight jiggle in the center—this gives the bars that luscious texture. Keep an eye on it to avoid overbaking!
Cool and Chill
Allow your freshly baked bars to cool at room temperature for a bit. Once they’ve cooled, place them in the refrigerator for at least 2 hours before cutting. This chilling step ensures they slice nicely and hold their shape.
Dust and Serve
Finally, dust with a bit of powdered sugar before serving if you desire that beautiful presentation touch. You want that little extra flair!
How to Store Key Lime Pie Bars
Leftover Key Lime Pie Bars maintain their delicious quality beautifully! Store them in an airtight container in the fridge for about 3-4 days. If you happen to have some left after that (a miracle indeed), they can be frozen for 2-3 months. Just thaw them in the fridge overnight before enjoying again.
Tips for Success
- Use fresh key limes for the best flavor.
- Press the crust firmly into the pan to prevent it from crumbling when cut.
- Allow ample chilling time for the bars to set properly before cutting.
- Taste the filling before baking to check the sweetness and adjust if needed.
Serving Suggestions
- Serve with a dollop of whipped cream for extra indulgence.
- Pair with a light summer salad for a refreshing meal end.
- Drizzle a little honey on top for added sweetness and flavor.
- Garnish with fresh lime slices or mint leaves for a pop of color.
- Enjoy with a tall glass of iced tea or sparkling water for a refreshing afternoon treat.
These Key Lime Pie Bars are sure to become a beloved staple in your kitchen, just as they are in mine! Enjoy every zesty bite!